In this Framer tutorial, you’ll learn how to make a “back to top” button without the need for any code!
This short guide is entirely beginner-friendly. But to make things even easier, I’ve prepared a free working project you can remix for reference.
STEP 1: CREATE THE BUTTON
Begin by designing a simple button component with a link variable.
Usually, this button is placed somewhere in the bottom-right of the page – although you can put it anywhere you like.
To ensure it’s always in the top-right corner, set its positioning to “fixed” and set both right and bottom constraints to 25px.

STEP 2: ADD A SCROLL SECTION
Now that we have the button in place, it’s time to create a target for it. To do that, assign a scroll section to the hero section of your page.
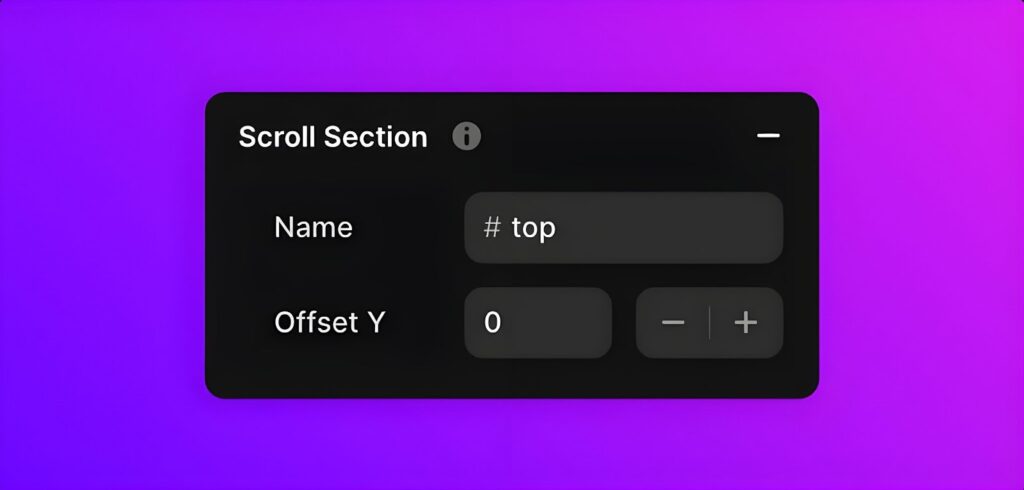
Select the hero section, click on “Scroll Section” in the right sidebar, provide a name (e.g., “top”), and leave the “Offset Y” at 0.

STEP 3: LINK THE BUTTON
The final step involves linking the button.
Select the button, set the link to the same page, and choose the recently created section as the target. It’s that easy!
BONUS STEP
Here’s a bonus step if you only want the button to appear when the user has scrolled past a certain height.
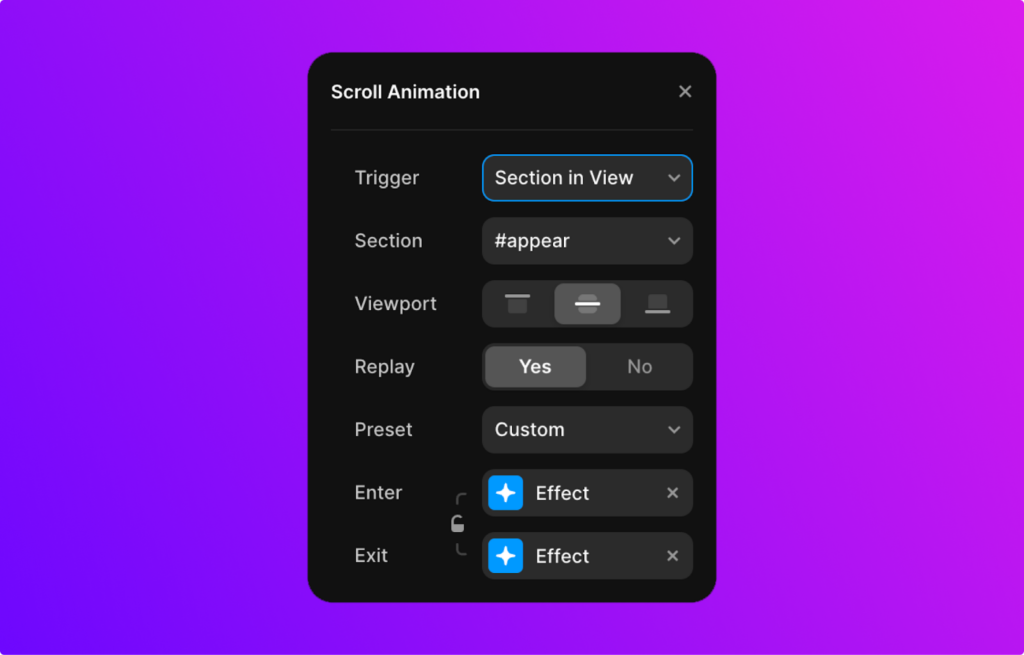
To do that, add a scroll section to the second section of the page. Then, add an “appear” animation to the button, which gets triggered when the section you’ve just created is in view.
Make sure the “replay” property is set to “yes” so the button disappears when the user scrolls back to the top.

CONCLUSION
And voilà! You’ve just successfully created a scroll-to-top button in Framer.
Don’t forget to grab the free project for a hands-on reference.
Happy designing!
WRITTEN BY
Luca Da Corte is a freelance Framer Expert and SEO specialist. When he’s not working on some exciting projects, he curates a blog where he shares insights, resources, and experiences on everything regarding websites.

Leave a Reply